Compare virtual hair colors on one photo
Keep the photo and controls consistent, inspect the edits, and record why you prefer one shade.
TL;DR
The shortest version before the full guide.
- Use the same portrait for the first comparison, with the hair outline and natural texture visible.
- Compare a small shortlist while keeping Color mode, Intensity, and Shine consistent.
- Inspect the face and background as well as the hair; a generative edit may change more than intended.
- Write down the controls and why you prefer a result so the comparison is useful later.
- Treat previews as visual references, not a promise about the final dye result.
Start with one photo and a short list
A virtual hair-color try-on is most useful when it helps you compare specific possibilities on your own portrait. Start with the same source photo for each shade. Keep the other editing controls consistent so the comparison is easier to interpret.
Choose two or three directions you actually want to consider. For example, you might compare a darker brown, a warmer brown, and a copper direction. These are preferences to explore, not colors prescribed by a face-shape or skin-tone label.
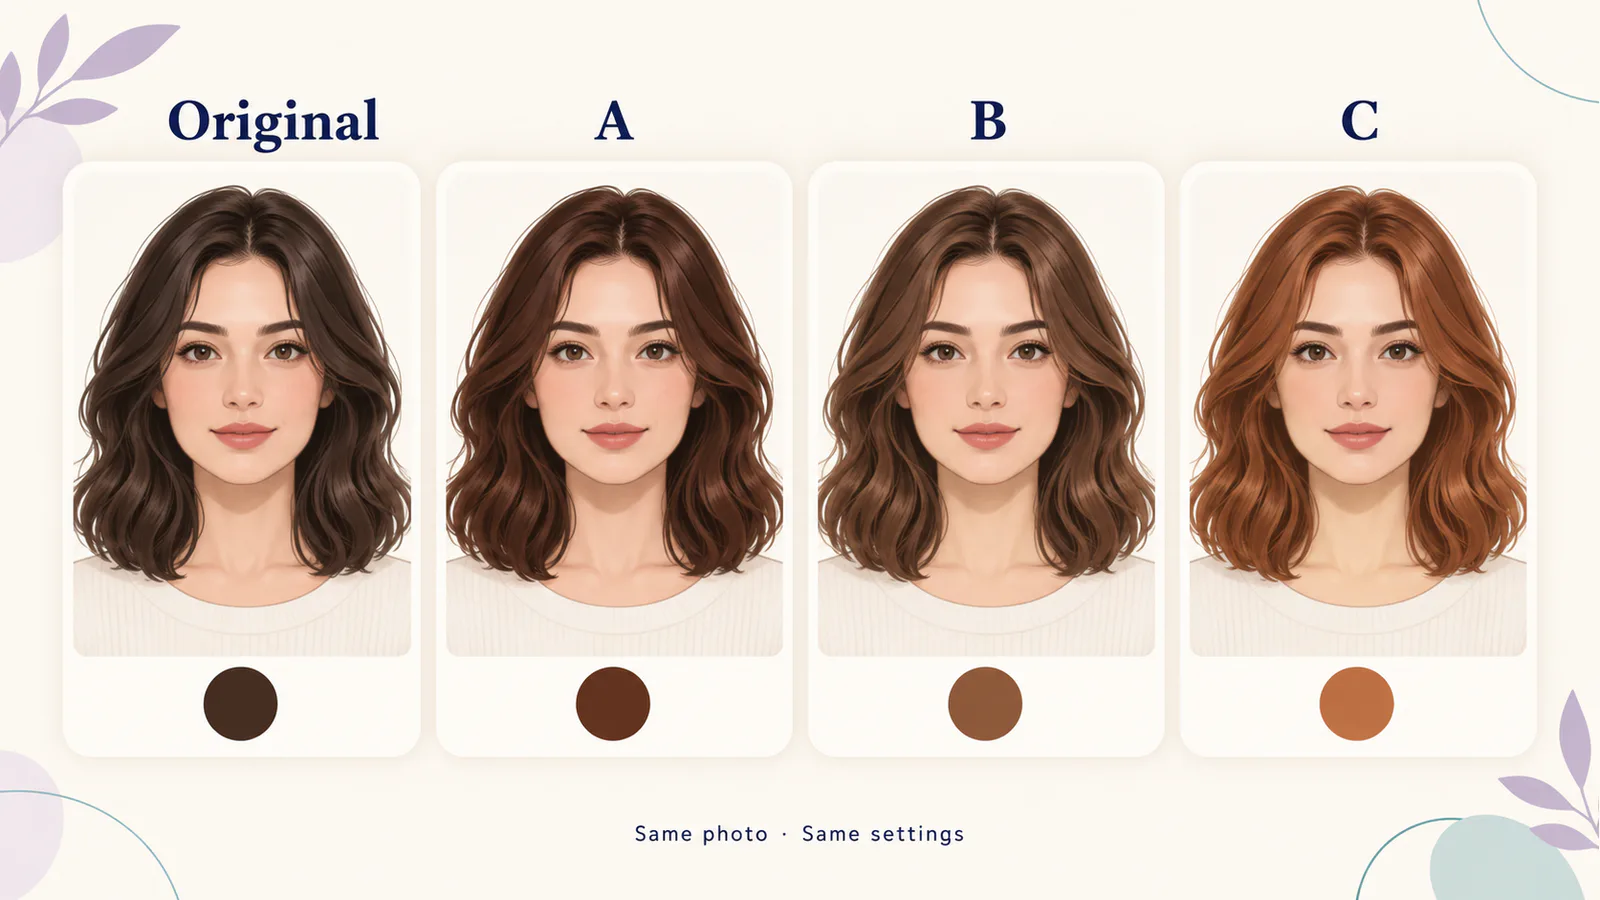 Illustrated same-photo comparison, not a recorded tool generation or predicted dye outcome. Keep the source photo and other settings consistent when comparing shades.
Make the hair visible in the source image
Use a sharp portrait with visible roots, ends, and hair edges where possible. Avoid strong color filters, a hat covering most of the hair, or a crop that hides the part you want to recolor.
Prefer light that lets you see the existing shade and texture. If the whole image has a strong colored cast, the preview will be harder to interpret as a color reference. The photo-selection guide can help you choose between existing images.
Keep this portrait for the first comparison. Testing a different photograph later can help you explore another setting, but that is a separate comparison with different lighting and framing.
Use the actual hair-color controls
Open Hair Color Changer and choose your photo. The current controls include:
- Color mode: choose Single color or Base + highlight.
- Palette and Custom color: select the color you want the editor to use.
- Highlight color: available for the Base + highlight mode.
- Intensity: a lower setting keeps more of the original color; a higher setting requests a stronger change.
- Shine: a lower setting requests a more matte appearance; a higher setting requests a glossier appearance.
For the first shortlist, use Single color and hold Intensity and Shine fixed. After choosing a direction, you can explore the effect strength or highlights in a separate comparison. The tool uses these controls rather than a free-text prompt field.
Login and Credits are required for generation. Each new image is new work; check the cost before starting. Reopen a completed result when you only want to inspect it again.
Copy a comparison record
The following is an illustrative settings plan, not an experiment we performed or a recommendation about which shade suits you. The numbers are control values, not percentages of physical dye or guaranteed output color.
You can choose different colors and settings. The useful part is the record: it separates the color you requested from changes the generated image may have introduced.
Compare the person before the shade
First compare each generated image with the original. If the editor changed the face, skin tone, expression, hair length, or background substantially, that result may distract from the color decision.
Then compare the previews with each other:
- Overall color: do you prefer the darker, warmer, lighter, or more vivid direction in this image?
- Roots and edges: does the color cover the intended hair area without spilling onto skin or clothing?
- Texture: are the original strands and part still readable, or has the edit created an unrealistic smooth patch?
- Shine: are you reacting to the shade or to added gloss? Keep the setting consistent for the first pass.
- Context: which preview fits the look you want with the visible clothing and brows?
A brighter or smoother overall image can appear more appealing for reasons unrelated to the requested shade. Keep that observation in your notes instead of treating it as proof that a color is objectively better.
Try highlights after narrowing the direction
If you prefer a color family but want less of an all-over change, test Base + highlight separately. Choose the base and highlight colors, then keep the source, intensity, and shine consistent within that new set.
In MogScore, Base + highlight requests highlight-style accents rather than split dye. Inspect their placement in the result. A preview of placement is a reference to discuss, not a detailed application plan for a colorist.
Turn the preview into a useful styling reference
Keep your original portrait, your preferred preview, and one alternative. Add a sentence explaining the choice, such as: “I prefer the warmer direction, but I want to retain visible darker roots and a less glossy finish.” This communicates more than a color name alone.
Ask your stylist what is feasible from your current hair and previous color history, and what maintenance would be involved. The image editor does not establish a dye formula or predict the actual service outcome.
You can also change your mind after the preview. The result has helped if it lets you narrow the decision or explain your preferences more clearly.
About the method
The controls and example record above describe MogScore's photo-based tool. The values are illustrative and were not tested as a color-accuracy benchmark. A virtual try-on from L'Oréal Professionnel illustrates the broader use of camera/photo previews to explore shades; it does not validate MogScore's rendering or the example colors here.
Frequently Asked Questions About Virtual Hair Color Try-On: How to Compare Shades on One Photo
Answers to common questions about this guide.
Use the guide with a current-photo preview
Start with one clear photo, then use the guide to decide which setup or style change to test next.
Related articles
Continue with the next setup, glossary, or product guide.
 Photo TipsBest Photo for an AI Face RatingChoose one usable original from your photo library, record why it works, and fix the specific problem if the scan fails.