
Camera setup for repeatable face photo comparisons
Make a repeatable baseline, keep a capture note, and run one useful retake without changing the whole setup.
TL;DR
The shortest version before the full guide.
- Keep the device, lens, lighting, position, and expression consistent for a baseline.
- Change one variable in each retake and record what changed.
- Moving farther away changes perspective; cropping the same close-up does not.
- Judge the intended visible change instead of choosing only the highest number.
Define one comparison question
A useful retake has a question you can answer by looking at the photographs. Try “Does moving the lamp make both sides of my face readable?” or “Does this hair arrangement keep my forehead visible?” Avoid changing the room, phone, pose, and hairstyle together: even a striking difference will be hard to explain.
The result of this guide should be a baseline photo, one comparable retake, and a note explaining what changed. This home-photo protocol reduces obvious comparison errors; it does not validate MogScore's scores. For choosing an existing file, use the upload selection guide.
Establish a baseline you can repeat
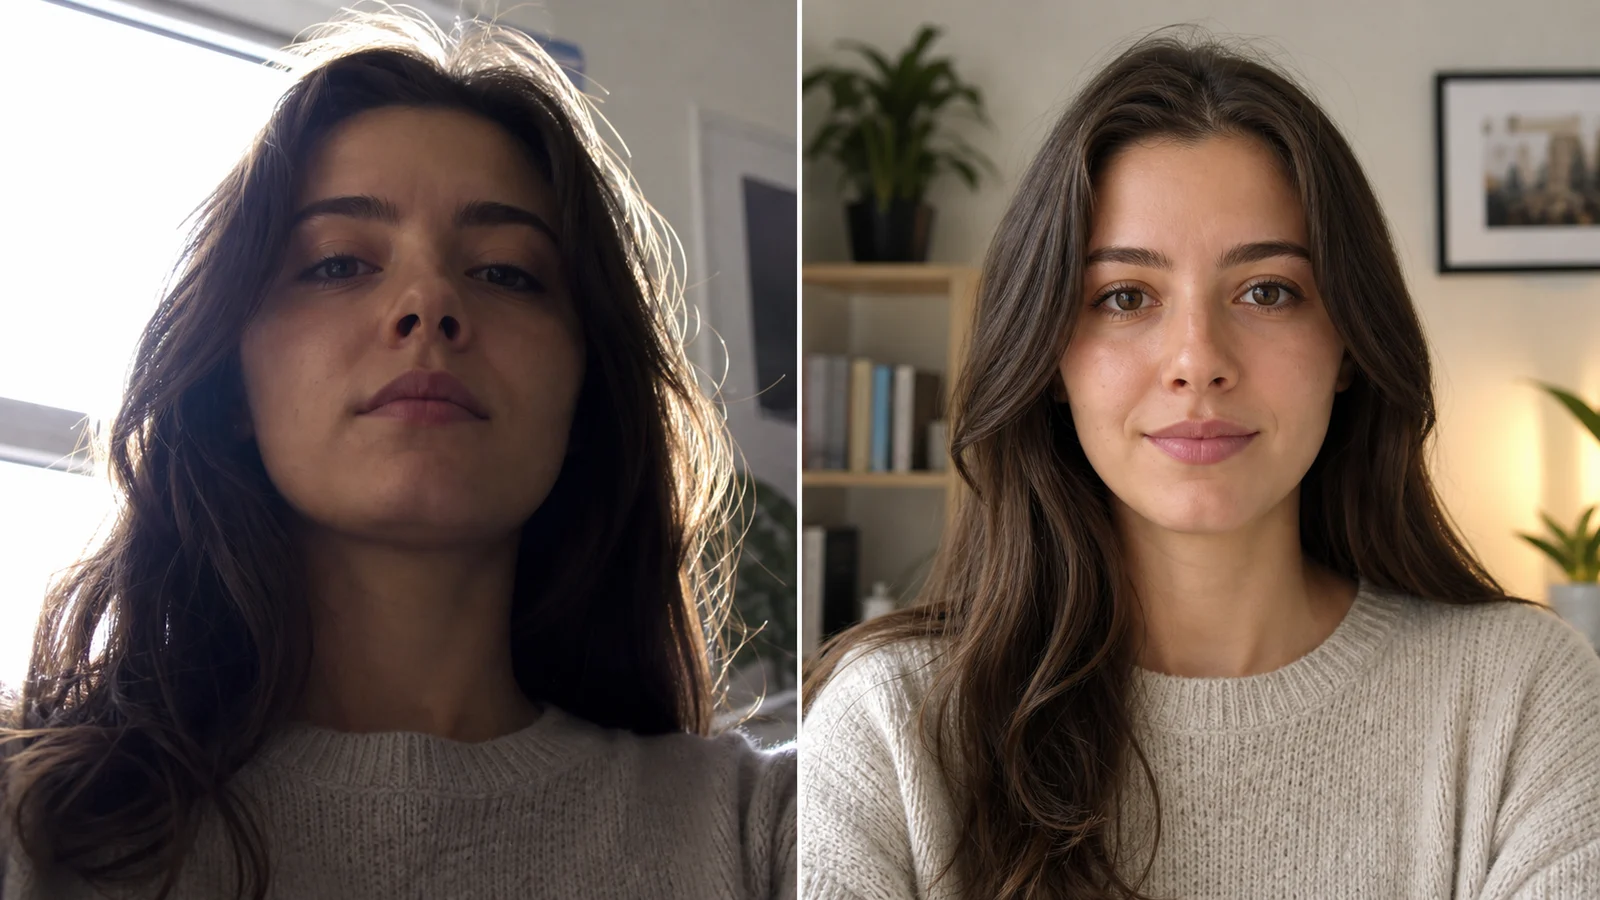
Place the camera on a steady support near eye level. Face a soft light source such as a window or a lamp that does not create severe glare. Keep the full face inside the frame and check focus before taking the baseline. Use the same lens for the whole comparison; switching between an ultrawide lens and a portrait view changes more than one variable.
Choose a comfortable position with enough distance to avoid a very close selfie. Mark the chair and camera positions with temporary floor marks or record the setup in a short note. There is no required studio kit and no calibrated distance that guarantees an accurate attractiveness score.
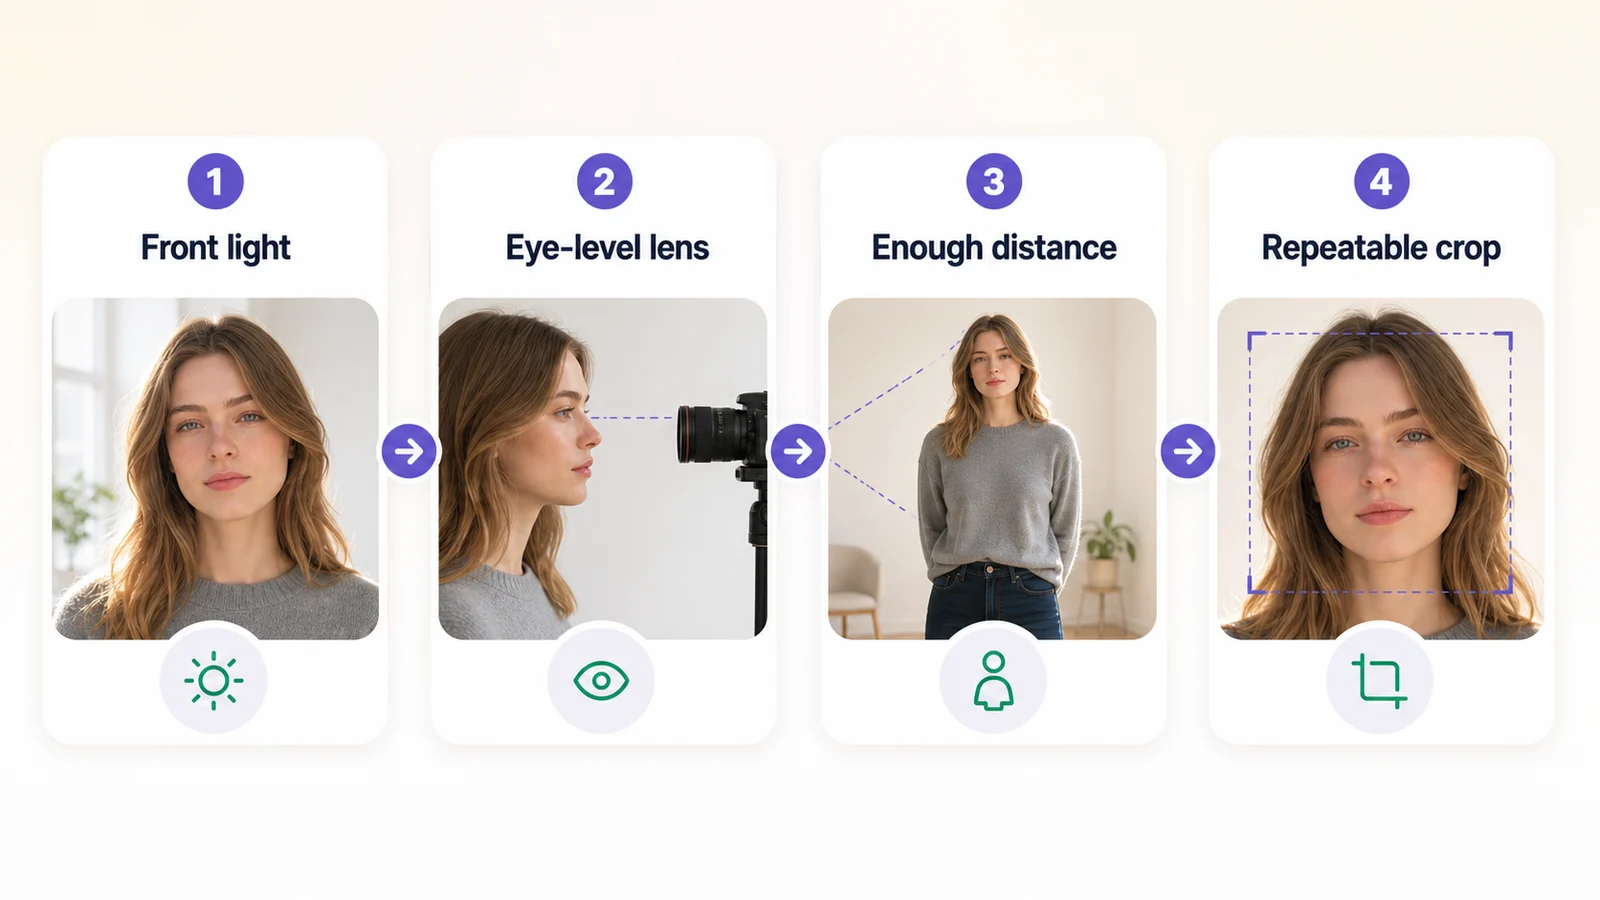 Set these once before starting a one-variable comparison.
Use an ordinary expression you can reproduce. If one image has a broad smile and the other has a tense jaw, you are comparing expression as well as the intended adjustment. Leave filters and automatic face reshaping off. Keep the original files rather than comparing screenshots with different compression.
Why distance deserves its own experiment
The 2018 research letter Nasal Distortion in Short-Distance Photographs: The Selfie Effect, by Ward and colleagues, models how camera distance affects apparent facial proportions through projection. It provides a reason to avoid treating a close selfie as a direct anatomical measurement. It does not test MogScore or establish an attractiveness benefit from any camera position.
Moving the camera changes the viewpoint geometry. Cropping the same captured photograph changes its frame but preserves that photograph's perspective. If you test distance, take another photograph from the new position and compare at a similar displayed face size. Do not describe a difference in the nose or jaw appearance as a physical change to your face.
Run a short sequence with a capture log
Save the baseline as A. For B, change only light direction while preserving the camera and subject positions. Compare B with A. If B answers your question, stop; you do not need to test every camera setting.
If you want to test another variable, either return to A's setup or explicitly make B your new baseline. Name the comparison pair in your note. C versus B and C versus A answer different questions if the lighting changed between A and B.
The following log lists separate suggested tests, not a completed MogScore experiment. Each retake starts from its stated baseline.
| Comparison | One change | Keep fixed | Question to inspect |
|---|---|---|---|
| A: baseline | None | Record lens, light, height, distance, and expression. | Which detail is difficult to read? |
| B versus A: light | Move the lamp nearer the camera axis. | Lens, height, distance, expression, and styling. | Are both face edges and eyes clearer? |
| C versus A: height | Return to A's light; raise a low camera toward eye level. | Light, distance, expression, and styling. | Is the intended view easier to repeat? |
| D versus chosen baseline: style | Change the hair part or grooming arrangement. | Use the chosen capture setup throughout. | Does the style create the intended frame? |
If you need to move closer to improve focus or farther back to correct a very close viewpoint, treat that as a separate retake. Write down the reason instead of folding it silently into another experiment.
Save a capture note you can reuse
Copy these fields into a note beside your original files. Use distances you actually measured or mark them as approximate; none is a required MogScore setting.
- Goal: the one detail I want to compare.
- Baseline file: name and capture date.
- Device and lens: phone or camera, plus the lens or camera mode used.
- Position: camera support, approximate lens-to-face distance, and camera height.
- Light: source, direction, and approximate time if using daylight.
- Expression and styling: what should stay the same.
- Retake file and comparison pair: which two files I will compare.
- One change: what I moved or adjusted.
- Observation: clearer, unchanged, or unclear, with the visible reason.
For example, a hypothetical note might read: “Compare B with A. Same phone lens, chair position, crop, hair, and relaxed expression. Change: move the lamp from my left toward the camera. Check: can I read both eyes and both face edges?” Fill the observation after looking at the originals; do not prewrite a successful result.
Compare the pictures before the numbers
Show the originals side by side at similar size. Inspect the exact detail your question names: readable eyes, visible hairline, a consistent outline, or a different hair frame. Then check whether the rest of the image stayed comparable. A crop or expression change is a reason to repeat the capture, not to dismiss the inconvenient result.
You can use the free Mog Rating preview as additional current-photo context. A higher result alone cannot show that a lighting or styling choice caused the difference. Repeating the same file also does not create independent evidence about your face.
Choose the setup that gives a readable, representative photo you can maintain. Stop once the practical question is answered rather than continuing until a preferred number appears.
Prepare multiple views for an analysis
For a full AI Face Analysis, keep the light, device, and styling consistent while taking the three labeled views:
- Front: look straight toward the lens with your full face visible.
- 45°: turn about 45 degrees so the front and side remain visible.
- Profile: turn to a full side view. Use the same side as the angled view when practical.
Change the viewing angle deliberately; these are complementary inputs rather than a before-and-after test. Check each for focus and visibility. General consultation can begin after sign-in without this photo set. Ordinary lighting differences should be described as limits; they do not automatically make a full report impossible.
- Name the visible change you want to test.
- Save a baseline and record its setup.
- Change one variable per retake.
- Inspect matched originals before reading scores.
- Repeat an inconsistent capture rather than inventing a cause.
- Stop when the practical question is answered.
Sources and method
Prepared by MogScore; updated October 2, 2026. The sequence and capture note are suggested exercises, with no measured score outcome. Ward and colleagues' 2018 research letter supports the camera-distance explanation; it does not test MogScore or establish an ideal rating distance. The three-view instructions were checked against MogScore's analysis photo slots and photo-quality guidance.
Frequently Asked Questions About Camera Setup for Repeatable Face Photo Comparisons
Answers to common questions about this guide.
Use the guide with a current-photo preview
Start with one clear photo, then use the guide to decide which setup or style change to test next.
Related articles
Continue with the next setup, glossary, or product guide.
 Photo TipsBest Photo for an AI Face RatingChoose one usable original from your photo library, record why it works, and fix the specific problem if the scan fails.
 ExplainerWhat Does Get Mogged Mean?Understand mog, mogged, and mogger through sentence examples, check the tone of a caption, and separate a photo observation from an appearance hierarchy.